Tuesday, June 19, 2007

Wedding Photography Project - Cool Photo Contest


Check out the contest that I have running over at The Wedding Photography Project - Win a Boda Bag!

Saturday, June 16, 2007

Thursday, May 24, 2007

Advice for aspiring photographers...

I was recently asked what advice I would give photographers just starting out. As you have probably figured out, I like lists, so here's a list of my advice!
  • Follow your passion. Shoot in a the way that you like and inspires you. Don't get caught in the trap of "the way things should be done."
  • Be yourself. No matter how much you like a particular website, a person's work, their choice in music, or the clever way they wrote their "About me" page, DON'T COPY IT. Being inspired to a better level is good, but be yourself.
  • Learn about light and learn how to see light.
  • Don't be afraid to screw up. I throw out 3 out of every 4 images I shoot. I make mistakes on purpose just to see if I might get something cool.
  • Learn the "rules" of composition. Sometimes they help to make things interesting. Other times, just throw them out the window to try something interesting.
  • Be a good business person. If you have trouble with some aspect of business - reading a profit and loss report, marketing, or anything else - figure out how to do it better. Whether that is by reading a book, finding a mentor, or hiring someone that does that well.
  • Show people what you want them to hire you to do. If you love to do traditional portraiture, show books and images that highlight that. If you don't care if you ever do another family group photo, why have an album filled with them?
  • Backup gear is important.
That's my list! If anyone has something to add to it, post it!

Wednesday, May 23, 2007

Gearbox!

I quite often get questions about what kind of gear I use. I'll happily tell you all, but first I have to get on my soapbox.


The most important piece of gear you will ever have in photography, is the gray thing sloshing around in your noggin! Gear is just a means to an end. Great photographers can create great images with cheap gear and horrible photographers can buy all the gear they want and it won't make any difference!


Here is the gear I use at almost every wedding:
-Canon 30D & 20D cameras
-Tokina 12-24 f4
-Canon 17-55 f2.8 IS
-Canon 50 f1.4
-Canon 85 f1.8
-Sigma 70-200 2.8 HSM
-Pocketwizards
-Canon 550EX x2
-Canon 580EX
-Lightstand

I have a whole bunch of other stuff that I sometimes use, but this makes my main kit.

Tuesday, May 15, 2007

Business - Make more money and provide better service!!!

Many times I've struggled with the idea of sales and trying to sell more to my clients. I don't like to feel pushy or like I am trying to milk people for more money. My attitude towards sales has changed significantly in the last couple of years. Namely, I no longer assume that my clients work with the same budget that I would have.

I believe this new attitude towards selling things has actually increased my clients overall satisfaction. I still don't like the words sales or selling, because it sounds like I am pushing things that a client might not want. What I actually do is show my clients what is possible, tell them what I think would be really fun and cool to do with their photographs, and see if they have any interest in doing it. Instead of thinking, "They have spent quite a bit, do I show them something else?" I think, "What would be really fun to do with this couple (or these images) would be to..." Then I let them decide.

To give you an idea, I have a couple that wanted some engagement portraits for their local newspaper. Because I thought it would be cool, I showed them an album that I have done with engagement portraits. They loved the idea and are making a book. They are happy because they get a cool album with their engagement portraits. I am happy because I get to make something cool with their portraits. Also, my bank account is happy because I made a profit on it.

Monday, April 30, 2007

Great Workshops!

There are some great workshops out there. Here are three that you might want to look at.

"Hey, Cory! Why is your flash sideways?" AKA, The Bounce Flash Article!

I am finally getting started on my series of articles on flash. I am going to start with the type of flash I use most often - the on-camera bounce.

The reasons I use on-camera bounce:
  1. I move quickly and quite often have the two options of available light or on-camera flash. Sometimes the available light in a room is not flattering.
  2. I don't like direct on-camera flash in MOST situations as it produces very flat lighting with harsh shadows
  3. Soft, bounced lighting, when balanced with room lighting, looks natural and flattering.

The reasons NOT to use bounce flash
  1. Some rooms don't lend themselves well to bounce flash (ballrooms a mile wide with 40 foot ceilings, black paint on the walls, red paint on the walls if you are shootingJPG, etc.)
  2. It does not add any drama to the photographs (harsh lighting is dramatic and can add or detract from a photograph, soft lighting usually does neither).
  3. Beautiful natural lighting already exists in the environment you are in.

Equipment that you will need.
  1. A digital (or film, I suppose) SLR
  2. Flash capable of tilt and swivel.
  3. A piece of black plastic and some Velcro.
  4. Good batteries

Okay, here we go with the meat of the article.

Bounce flash is a quick and easy way to upgrade the lighting in a room. Whenever I am looking through my camera I am looking at the type and angle of light as well as content and composition. When I see that the lighting is mostly from overhead sources, I usually want to modify it somehow. Overhead lighting as the only source of light leaves dark shadows in the eyes and causes people to look tired. This is probably my least favorite type of lighting.

To use bounce flash, you don't have to do anything too difficult. You attach your flash to your camera (or to an off-camera shoe cord if you wanna get funky) and point the flash in the direction that you want the light to come from. Imagine that you have a big softbox on a set of wheels that you can position anywhere you want in the half-circle behind you. You can place directly to the left or right, directly overhead, directly behind you or the the left or right of directly behind. You obviously can't make it come from the far side of your subject because of the physics involved (think of shooting a cue ball in pool - you can't bounce the ball off the bumper directly on the far side of another ball without hitting the ball).


The softbox concept

A portrait on the fly using bounce flash

Now that you have your flash bouncing around the room, you need to control it a bit. The first thing to keep in mind is how you want the lighting to appear. Do you want to drown out the existing lighting, add to the existing lighting or somewhere in between? My favorite way to do it is to add to, but not completely overpower the existing lighting. I do this by manually setting the exposure to keep the room lighting the way I want it (to add to, but not completely overpower, I might set the exposure to underexpose the existing light by one to two stops). Also, the slower your shutter speed, the more you have to have the room lighting below the flash setting. To give you an example, if you are shooting at 1/20 of a second with only a one-stop difference between room light and flash, you will have blur from the movement of the people as recorded by the by room lighting after the flash has fired. In which case, you need to increase the difference to two stops to avoid the flash-blur look. Unless, of course, that is what you are going for!


Bounce from the right of the room balanced to the room light.

Something else that I wold recommend is controlling the light from falling directly into the frame (this is a more common problem when shooting wide). To do this, you either need to zoom your flash or create some sort of snoot-type device for your flash. You can see what I did here with a piece of black plastic (a file folder from Staples) and some Velcro. This prevents flash from hitting someone directly into the scene I am shooting. I've shown it to other people, but most don't share my enthusiasm for attaching ugly, home-made devices to their flashes, but willingly spend $40 on a piece of Tupperware to sit on top of it!


My setup with black plastic "bounce tunnel"!

I have four more hints with bounce flash. The first is to use a high ISO because this increases the sensitivity of the sensor, which in turn reduces how hard your flash has to work and reduces how badly you blind anyone that makes the mistake of standing next to you! Second, buy a good pair ofNiMH batteries. NiMH batteries keep a consistent recharge rate during the life of the batteries. With Alkaline batteries, the recycle times on your flash become longer and longer as the power is drained out of them. Third, be aware of your surroundings. It doesn't do any good to want the light to come from the left if the nearest wall is 120 feet away. It also doesn't do any good to point a flash directly at the mother of the bride's face! No matter how annoying you may find her, nothing good will come of blinding her! That last is just a joke; I haven't had an annoying MOB in years.


Another example of side bounce.


Finally, experimentation is good! In fact, it is the only way to get a good handle on using bounce flash. Go forth and bounce!

Sunday, April 29, 2007

The workflow

I sometimes get asked what my workflow is like. So, here is a quick sketch!

1) Shoot the wedding in RAW
2) Download the cards using Downloader Pro by Breezebrowser and a Sandisk Extreme USB 2.0 Card reader to an external drive
3) Renumber images using Breezebrowser
4) Burn 2 copy discs of RAW images to DVD using Nero
5) Import into LightRoom
6) My wife picks images from 3000 to 700 using LR flag feature
7) Process picked images using LR
8) Export JPG's
9) Check the JPG's using Breezebrowser fix anything that needs to be fixed in Photoshop
10) Renumber the JPG's using Breezebrowser
11) Burn three copies of the final JPG's - one for client, two for my files
12) Jettison the RAW images (still have the backups)
13) Run RedCart script in Photoshop
14) Upload Cart
15) Choose favorite images for Slideshow
16) Size images for proofing section of website using Breezebrowser
17) Upload slideshow images to website
18) Size all images for proofing and add border with Breezebrowser
19) FTP proof images to ProDPI\
20) Select best of best for blog, size & post

Wednesday, April 25, 2007

Creating an Image (for your business)

One of my most common questions from other photographers is about advertising to get the clients you want. To me, this is putting the cart before the horse.

When you are creating a business, I believe that you have to start with an idea of what your business personality will be. To get this, I think you start with your own personality on your best day or what you strive for your personality to be. This could be "Like me, only more attentive to detail." Then start describing that person/business in single words.

Sophisticated, Down-to-Earth, Confident, Real, Sweet, Intriguing, Mysterious, Responsible, Trustworthy, Fun, Sarcastic, and Unique could be words to describe yourself and your business. Choose what you think are the two most important words, add in a short description of the work you do, and add the clientèle you wish to serve.

When you add it all up, you will end up with a statement that completely describes your business.
Cory Parris is a fun, relaxed and attentive photographer that creates beautifully elegant photostories for brides and grooms that put photography on the top of their priority list for both importance and budget.
This does not have to be difficult and it can change over time, so don't agonize over it. However, you now have a statement that you can pull apart and use for your marketing, creating your business plan (whether it is on paper or just in your head), and for guiding your creation of business image products such as your business cards, letterhead, brochures, logo and, most importantly, your website.

Once you have all of the ideas and materials in place, then it is time to market your business aggressively, whether you do that by advertising, networking, or word-of-mouth depends on your target market (that you just identified) and personality!

Monday, April 23, 2007

New main website for me!

I've just updated my website. Check it out and tell me what you think!

Wednesday, April 11, 2007

Cool Camera Bag!


My friend Jim Garner has come out with a new camera bag. This is a wedding shooter that designed the perfect bag for a wedding shooter. Check it out at GoBoda.

Tuesday, March 20, 2007

New variation on stroke and border!


I just finished the tutorial, when I decided to change it! Here's my new version. I played around with changing the canvas size in two steps rather than one, with the second step only streching the canvas from the top. Have fun!

Monday, March 19, 2007

Adding a stroke, border and logo!


I received an email the other day asking how I created my blog proof action that adds the border, keyline and logo to my images that I post on the blog. So here is a step by step tutorial on how I do it.

I want my blog proof to end up as 600 pixels on the long side. To do this, we will need to set up two actions, one for vertical and one for horizontal. Record this as you do it.

  1. Open a horizontal image
  2. Create a new Action called "Horizontal Blog Proof"
  3. Resize the image to 500 pixels wide
  4. Duplicate the layer - you can do this in the layers palette by dragging the layer called "background" to the new tab, which looks like a miniature blank piece of paper, at the bottom of the palette
  5. Resize the Canvas to 600 pixels and choose the appropriate color for your background (I chose black, of course). This will create a large, even black border all the way around your image.
  6. Select the top of your two layers and add a stroke of the color you like by clicking on the circled "f" at the bottom of the layers palette and choosing stroke. The image above is a one pixel, white, inner stroke.
  7. Now stop recording and create a snapshot of your file.
  8. It is time to set up your Logo file, so open your source logo.
  9. Resize your logo to slightly larger than you expect to use it on your image.
  10. Drag the logo to your image, this will create a new layer with just your logo on it. There should not be a background on your logo at this point. If there is, you may have to go to a different version of your logo that you received from your designer.
  11. Drag the logo to where you want it on your image.
  12. Resize the logo to the right size by using the Free Transform tool (Cntrl+T). Make sure to hold down the shift key as you drag the corner so the logo does not get warped.
  13. Delete the layers besides the logo (to delete the layer titled "background" you will have to rename it first)
  14. Create a blank layer and drag it to underneath the logo. You should now have two layers, one with your logo on it, and one blank below it.
  15. Save this in a location that you can find it again as a photoshop (.psd) file with the name something like "horizontal logo file for blog"
  16. Now look at your history palette and choose the snapshot of your file that you created before you started working on your logo.
  17. Go to your action and start recording again
  18. Choose the Place command (File-->Place) and choose the Horizontal logo file for blog.
  19. If it does not automatically put the logo in the right place, you may have to make sure all the corners line up.
  20. Flatten the image (Layer-->Flatten) and stop recording, you are done.
You will have to repeat this for the vertical action. It is also then possible to create a script that tells whether the image is horizontal or vertical and run the appropriate action on it. Once it is set up, you can always modify the action as your tastes change. Also, once it is set up, all you have to do is run the action and it does all this work for you automatically, every time!

Wednesday, March 14, 2007

Direction and Quality of Light

I was going to start writing my articles on flash today, but I thought that as a prologue, I would first talk about the quality and direction of light.

Light, in my mind, has two characteristics. Direction and Quality. Light can surround you almost perfectly even from every direction, or it can stream harshly from one direction. It can be soft or it can be harsh. It can have these traits whether you are using natural light or creating the light with flash (this is why this article came first).

Light can be soft, harsh, directional or enveloping. I've grabbed some examples from my latest wedding to illustrate and show you how I use the different light qualities.


Natural, soft window light streaming in the door. I chose to backlight the dress so that the light would shine through it.


This was taken with available light in the room. This was less of a conscious choice and more of grabbing a moment with the current equipment.


I placed Kellie near the window to get the soft, very directional light on her face.


Available light in the chapel.


As the ring bearer and flower girl were walking down the aisle, I was luck enough to capture the harsh, directional light of Grandma's flash, which backlit them beautifully.


Again, using the available light (actually more available darkness). The alter was lit, but the rest of the room had only candles for illumination causing the couple to be severely backlit.


The soft, enveloping lighting of a bounced flash.


This image is the result of two flashes. One on a lightstand creating the main exposure and backlighting the couple, and one on camera at one stop below the exposure to illuminate the near side of the couple.


This image is during the college fight song, with the off-camera flash creating the main exposure (and harsh directional lighting) and the on-camera at one stop below filling in the shadows and making the effect less harsh.


The final image of David's fist-pump is again the soft, enveloping, directional (from the right and above) light of bounce flash.

Monday, March 12, 2007

The Wedding Photography Project!

Most of you probably already know that I run another website that features articles written by photographers other than myself at the Wedding Photography Project. There are two new articles there by Jeff Lazo of ProDPI lab talking about printing, and an excellent article by Neil van Niekerk about balancing flash with fireworks. Great stuff!

Saturday, March 3, 2007

Good Article at PhotoEdu!

Jerry Frazier has a great article about the cost of doing business and how to do business with the opportunity to make a profit at his PhotoEdu blog. You don't have to constantly buy new gear to get great results!

Friday, March 2, 2007

PHOTO LOVECAT: ALBUM RESOURCES

For professional photographers and aspiring professionals, check out the album resource list over at Photo Lovecat: PHOTO LOVECAT: ALBUM RESOURCES

My favorite books are Graphistudio, Leather Craftsmen, Zookbinders, Queensberry, and (one that's not listed on her list) Photomounts Australia.

For designing the books, I prefer to do my own using Photojunction software.

Back to Basics - 3 Camera Settings for Rockin' Exposures!

There are so many bells and wistles on cameras that people get lost. It is a great example of how adding capabilities makes things more obscure. I recently bought a camera that is around 50 years old. How few buttons and features there were on the camera really made me realize how complex a digital SLR really is.

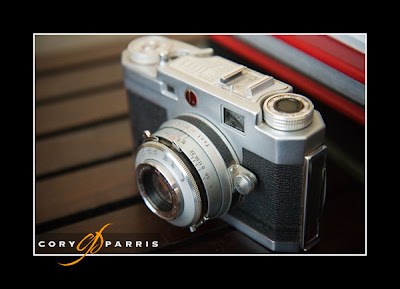
On this camera, there are three settings - aperture, shutter speed and focus. Because it has no built-in meter, getting the correct exposure was a little bit of guesswork for most people. With film, though you could be pretty far off and still get a decent image.

When everything is stripped down like this, you can see that there is really only three setting that you need to get a proper exposure, plus you need to focus the camera. Everything else is extra or bonuses.

The three settings you need to take control of on your camera are the basics, that we talked about above, plus the ISO (it used to be called film speed, but, since film is optional these days, let's call it ISO). The ISO is what people forget they can change.

Shutter speed controls the amount of time the sensor/film is exposed to light. Aperture or f-stop controls the size of the hole at the back of the lens. ISO controls how sensitive the sensor/film is to light. With film, you are basically limited to what it says on the side of the film box (there are other options, but that is far more advanced than we are talking now). With digital, the ISO can be changed anytime!

The effect of changing shutter speeds
When your shutter speeds are slow, you will see blur in fast moving objects. A faster shutter speed freezes the action. Also, if your shutter speed gets too slow, the shaking of your hands will cause the entire photograph to become blurry. For a good rule of thumb, try to keep your shutter speed at 1/60 of a second or higher (1/125, 1/250, etc.) with a normal lens. With telephoto lenses you will need faster shutter speeds.

The effect of changing apertures
The aperture controls what is called "depth of field". Depth of field is how much of the photograph will be in focus. We are all familiar with depth of field, but we rarely think about it. Ansel Adams liked a lot of depth of field. He wanted everything in his images to be sharply in focus. Most fashion models and many portrait photographers like the opposite. They want their subject to be sharply in focus, with the background becoming extremely blurry. That way, when someone looks at the photograph, they notice the person rather than the background. A wider aperture makes for more background blur (1.4, 2.0, 2.8), which you can see with much of my work. A smaller aperture provides more of the image in focus (8, 11, 16, 22, etc.).

The effect of changing ISO
Changing your ISO also has a significant impact on your images. Lower ISO speeds provide finer detail, smoother gradations, more vibrant color, and greater exposure latitude (exposure latitude is a fancy way of saying that you can screw up more and come up with a good image). Higher ISO creates more noise or grain. So it seems obvious that the lower ISO's are better. Well, that is true for most cases, but, when you have very little light to work with, or you are trying to create a particular look, higher ISO is the way to go.

How they work together
Okay, so all of this is fine and dandy. It's pretty simple to understand. Now, how does it all work in the real world?

I'll start by explaining how I work. I love shallow depth of field, vibrant colors, sharp b&w's, and high ISO's. The shallow depth of field makes whoever I am photographing stand out from the background. Vibrant colors and contrasty b&w images are fairly self-explanatory. I prefer that images have impact rather than being subtle. I love high ISO's because they allow me to take photographs that I might not be able to get otherwise.

I keep my cameras at apertures around f2.8 or lower most of the time. The exceptions are when I am taking scenics and when I am photographing groups. At these times, you need more depth of field to make all the important stuff be in focus. That means the things that change more often are shutter speed and ISO. They change according to the light level that you are shooting in.

If shutter speeds get too high (above 1/1000 of a second unless I'm already at ISO 100), turn down the ISO. If they get too low (below around 1/60 of a second with a normal lens), turn up the ISO.

Of course, this a vast over-simplification (from my point of view), but it's how I work in many instances. As always, let me know if I'm speaking a foreign language (photogeek), and I'll try to say it again in English!

Tuesday, February 27, 2007

Flashin' for the fun of it!

On camera flash is at once over-rated and over-maligned. It is one of the most versatile and empowering tools in a photographer's bag. Over the next couple of weeks I'm going to write a series of articles about lovin the flash!

Here is a quick overview of what I will be discussing.

Hey, Cory! Why is your flash sideways?


Quick Group Portrait Lighting for the PJ Wedding Shooter

Dynamic Lighting Using Off-Camera Flash


Flashin' in the Sun

Friday, February 23, 2007

Seattle Photographers Shootout Images!

You can find the images by going to Mat Hayward's website, enter the client proofing area, and entering the password "DWF" in all caps. Great work everyone!

Tuesday, February 20, 2007

Interesting B&W Conversion


Sean Flanigan has a fun b&w technique to play with over on his blog. Below is the photograph I took of Leslie recently. I played with the technique Sean talks, modified it a bit and added a slight sepia tone to add to the vintage feel.

A photogeek's dream office!

Check out Jeff Newsom's photogeek heaven of an office! He's a pretty decent writer, and a downright awesome photographer as well!

Monday, February 19, 2007

Seattle Photographers Shootout!

I had a great time photographing Seattle and hanging out with fellow photogeeks! Here are a few images of the participants.Andrew for the Dgrin/Smugmug forum

This is Ben. I photographed his and Sarah's wedding a couple years ago!

Sarah!

The only member of the Portland Mafia to attend: Evrim Icoz!


The handsome Joe Hein

The love of Joe's life (besides his D2x) Jill Hein

Joe and Jill with their custom branded cameras.

John Krombine from the Madison Park Starbucks meeting I talked about earlier (third Thursday at 11:00).

I make this alley look good.

Here's the whole photogeek squad

Master planner and photographer extrodinairre, Mat Hayward

When looking for a shot, gotta love the cobblestone - much cozier than asphalt.

Laurence Chen from the Digital Wedding Forum
My favorite image of the day, bar none. My lovely wife Leslie who is the light of my life and my best friend!

Friday, February 16, 2007

The steps to a photography business - the short version!

Start by taking stock of what you have and what your goals are. What are your assets? Money, time, etc. How are your images? Fantastic, needs work, true beginner. Where do you want to be in 1 year? 3 years? 5 years?

My answers would go in this order:

1) Get what you need in the way of equipment to produce good work. This does not need to be the flashiest of gear (a 50 1.8 or 35 f2 could be a big improvement in creating a "different" look on the cheap as would a 85 1.8). A vivitar flash and some pocket wizards (or generic alternative) can create dramatic results in the right hands as Zach Arias has often shown. Also get something wide (20mm on 5d or a 12-24 f4 tokina on a crop camera) to add drama and see things a different way. With a couple of these suggestions, you can be producing a wide variety of different looks and have spent less than $1000. It also works as a backup strategy if something breaks.

2) Educate yourself in creating amazing images. One Light is a good place to start. As is the usual $100 Denis Reggie tour, or if Huy is doing a short course in your area. There are also many online resources. Second shooting for great shooters would work very well.

3) Once you know how to take amazing images, are inspired, well-equipped to take advantage of the opportunities you have or will get, and have a website capable of showing off your work in a up-scale, stylish way, then you can pour some money into advertising.

It is hard to work up a buzz as an average photographer, so educate yourself, equip yourself, produce some excellent work, THEN attack the marketplace. Spending money on advertising before you are ready is just wasting money. Getting yourself in position to attack the marketplace makes more sense.

What you have in the way of assets (namely time and money) will determine your strategy for the attack and the timetable involved. If you have more money than time (full time well-paying job and a family for example), spend the money on the best possible samples and advertise in the biggest, splashiest places. If your assets are more on the time side (part time working bachelor), then you might get a couple nice samples and try to get your name out by meeting everyone that will meet with you (florists, planners, venue coordinators, other photographers, etc.).

Madison Park Starbucks...


The third thursday of every month, a bunch of photographers get together to talk, share knowledge, be photogeeks and feed the elegant and classy addiction that is Starbucks. Networking and talking with photographers is a great way to fill the empty dates on your calendar. I get a few weddings every year from other photographers. It's like hanging out and talking about your favorite thing (photography) a finacially and educationally beneficial activity!

Here are a few images from yesterday. Some taken by me, and others taken by the wonderful Joe Hein of Joe and Jill Photography.


Great photographer and friend, Joe Hein of Joe & Jill Photography.


Eric Sartoris of Northern Lights.


The photogeek known as Cory Parris. I think Joe took this one!


The character that is Dani Weiss.


And the illustrious Natalie Fobes.

Choosing the right flash batteries

Here's a little detail that people rarely think or talk about. What type of batteries should you be using in your flash?

There are basically four options: alkaline, nimh, ni-cad, and external packs.

Alkaline batteries are the easiest to use because they are everywhere (and costco sells packs of 40 AA's for around $10). However, they are disposable causing hazardous waste, and they are not the best performers. When they are brand new, they work well. As the charge gets sucked out by the flash, the recycle times gradually get longer and longer, forcing you to wait between shooting exposures.

Ni-Cads have been around forever. They are relatively cheap, rechargeable, and produce faster recycle times. However, they don't hold as much of a charge, so you end up changing them more often and requiring you to bring a slew of batteries with you. They are also memory-type batteries. That means you have to fully discharge them before charging them again. You can buy the more expensive chargers that will discharge the batteries before charging, or just fire your flash until they are completely spent.

Nimh batteries are my choice. They are not too expensive ($20 for a set and a charger), hold a ton of energy (so you don't have to suddenly change batteries in the middle of the toast), and recycle at a quick, consistant rate until they are nearly completely spent. They are also memory-free so you can recharge them anytime without ruining the batteries.

External battery packs provide the most power and quickest recharge times. However, they also require extra cords and extra weight. For the right situation, and for some people this provides the best option. Personally, I hate cords on my cameras when I am shooting.

Wednesday, February 14, 2007

Happy Valentine's! And a b&w conversion for Photoshop

Hey gang. I hope you have a fantastic holiday with your loved ones!

Today I'm going to show you how to make a really fast, simple, high-contrast black & white conversion.

The first step is to make sure that you have the default black on white color set.

Then go the the layers palette and click on the adjustment layers symbol.

The third and final step is to choose the "Gradient Map" option.

All Done. Here is a before and after.