- Follow your passion. Shoot in a the way that you like and inspires you. Don't get caught in the trap of "the way things should be done."
- Be yourself. No matter how much you like a particular website, a person's work, their choice in music, or the clever way they wrote their "About me" page, DON'T COPY IT. Being inspired to a better level is good, but be yourself.
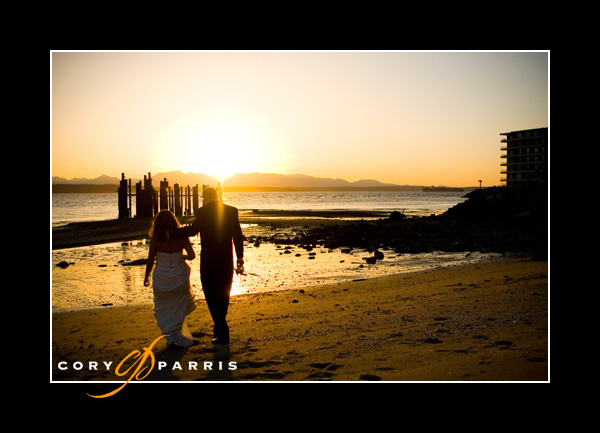
- Learn about light and learn how to see light.
- Don't be afraid to screw up. I throw out 3 out of every 4 images I shoot. I make mistakes on purpose just to see if I might get something cool.
- Learn the "rules" of composition. Sometimes they help to make things interesting. Other times, just throw them out the window to try something interesting.
- Be a good business person. If you have trouble with some aspect of business - reading a profit and loss report, marketing, or anything else - figure out how to do it better. Whether that is by reading a book, finding a mentor, or hiring someone that does that well.
- Show people what you want them to hire you to do. If you love to do traditional portraiture, show books and images that highlight that. If you don't care if you ever do another family group photo, why have an album filled with them?
- Backup gear is important.
Showing posts with label business. Show all posts
Showing posts with label business. Show all posts
Thursday, May 24, 2007
Advice for aspiring photographers...
I was recently asked what advice I would give photographers just starting out. As you have probably figured out, I like lists, so here's a list of my advice!
Wednesday, April 25, 2007
Creating an Image (for your business)
One of my most common questions from other photographers is about advertising to get the clients you want. To me, this is putting the cart before the horse.
When you are creating a business, I believe that you have to start with an idea of what your business personality will be. To get this, I think you start with your own personality on your best day or what you strive for your personality to be. This could be "Like me, only more attentive to detail." Then start describing that person/business in single words.
Sophisticated, Down-to-Earth, Confident, Real, Sweet, Intriguing, Mysterious, Responsible, Trustworthy, Fun, Sarcastic, and Unique could be words to describe yourself and your business. Choose what you think are the two most important words, add in a short description of the work you do, and add the clientèle you wish to serve.
When you add it all up, you will end up with a statement that completely describes your business.
Once you have all of the ideas and materials in place, then it is time to market your business aggressively, whether you do that by advertising, networking, or word-of-mouth depends on your target market (that you just identified) and personality!
When you are creating a business, I believe that you have to start with an idea of what your business personality will be. To get this, I think you start with your own personality on your best day or what you strive for your personality to be. This could be "Like me, only more attentive to detail." Then start describing that person/business in single words.
Sophisticated, Down-to-Earth, Confident, Real, Sweet, Intriguing, Mysterious, Responsible, Trustworthy, Fun, Sarcastic, and Unique could be words to describe yourself and your business. Choose what you think are the two most important words, add in a short description of the work you do, and add the clientèle you wish to serve.
When you add it all up, you will end up with a statement that completely describes your business.
Cory Parris is a fun, relaxed and attentive photographer that creates beautifully elegant photostories for brides and grooms that put photography on the top of their priority list for both importance and budget.This does not have to be difficult and it can change over time, so don't agonize over it. However, you now have a statement that you can pull apart and use for your marketing, creating your business plan (whether it is on paper or just in your head), and for guiding your creation of business image products such as your business cards, letterhead, brochures, logo and, most importantly, your website.
Once you have all of the ideas and materials in place, then it is time to market your business aggressively, whether you do that by advertising, networking, or word-of-mouth depends on your target market (that you just identified) and personality!
Monday, March 19, 2007
Adding a stroke, border and logo!

I received an email the other day asking how I created my blog proof action that adds the border, keyline and logo to my images that I post on the blog. So here is a step by step tutorial on how I do it.
I want my blog proof to end up as 600 pixels on the long side. To do this, we will need to set up two actions, one for vertical and one for horizontal. Record this as you do it.
- Open a horizontal image
- Create a new Action called "Horizontal Blog Proof"
- Resize the image to 500 pixels wide
- Duplicate the layer - you can do this in the layers palette by dragging the layer called "background" to the new tab, which looks like a miniature blank piece of paper, at the bottom of the palette
- Resize the Canvas to 600 pixels and choose the appropriate color for your background (I chose black, of course). This will create a large, even black border all the way around your image.
- Select the top of your two layers and add a stroke of the color you like by clicking on the circled "f" at the bottom of the layers palette and choosing stroke. The image above is a one pixel, white, inner stroke.
- Now stop recording and create a snapshot of your file.
- It is time to set up your Logo file, so open your source logo.
- Resize your logo to slightly larger than you expect to use it on your image.
- Drag the logo to your image, this will create a new layer with just your logo on it. There should not be a background on your logo at this point. If there is, you may have to go to a different version of your logo that you received from your designer.
- Drag the logo to where you want it on your image.
- Resize the logo to the right size by using the Free Transform tool (Cntrl+T). Make sure to hold down the shift key as you drag the corner so the logo does not get warped.
- Delete the layers besides the logo (to delete the layer titled "background" you will have to rename it first)
- Create a blank layer and drag it to underneath the logo. You should now have two layers, one with your logo on it, and one blank below it.
- Save this in a location that you can find it again as a photoshop (.psd) file with the name something like "horizontal logo file for blog"
- Now look at your history palette and choose the snapshot of your file that you created before you started working on your logo.
- Go to your action and start recording again
- Choose the Place command (File-->Place) and choose the Horizontal logo file for blog.
- If it does not automatically put the logo in the right place, you may have to make sure all the corners line up.
- Flatten the image (Layer-->Flatten) and stop recording, you are done.
Saturday, March 3, 2007
Good Article at PhotoEdu!
Jerry Frazier has a great article about the cost of doing business and how to do business with the opportunity to make a profit at his PhotoEdu blog. You don't have to constantly buy new gear to get great results!
Friday, February 16, 2007
The steps to a photography business - the short version!
Start by taking stock of what you have and what your goals are. What are your assets? Money, time, etc. How are your images? Fantastic, needs work, true beginner. Where do you want to be in 1 year? 3 years? 5 years?
My answers would go in this order:
1) Get what you need in the way of equipment to produce good work. This does not need to be the flashiest of gear (a 50 1.8 or 35 f2 could be a big improvement in creating a "different" look on the cheap as would a 85 1.8). A vivitar flash and some pocket wizards (or generic alternative) can create dramatic results in the right hands as Zach Arias has often shown. Also get something wide (20mm on 5d or a 12-24 f4 tokina on a crop camera) to add drama and see things a different way. With a couple of these suggestions, you can be producing a wide variety of different looks and have spent less than $1000. It also works as a backup strategy if something breaks.
2) Educate yourself in creating amazing images. One Light is a good place to start. As is the usual $100 Denis Reggie tour, or if Huy is doing a short course in your area. There are also many online resources. Second shooting for great shooters would work very well.
3) Once you know how to take amazing images, are inspired, well-equipped to take advantage of the opportunities you have or will get, and have a website capable of showing off your work in a up-scale, stylish way, then you can pour some money into advertising.
It is hard to work up a buzz as an average photographer, so educate yourself, equip yourself, produce some excellent work, THEN attack the marketplace. Spending money on advertising before you are ready is just wasting money. Getting yourself in position to attack the marketplace makes more sense.
What you have in the way of assets (namely time and money) will determine your strategy for the attack and the timetable involved. If you have more money than time (full time well-paying job and a family for example), spend the money on the best possible samples and advertise in the biggest, splashiest places. If your assets are more on the time side (part time working bachelor), then you might get a couple nice samples and try to get your name out by meeting everyone that will meet with you (florists, planners, venue coordinators, other photographers, etc.).
Monday, February 12, 2007
The Hows and Whys of Color Management!
Color management is the processes that photographers need to use to make sure their images look how they should!
Why would you want to be color managed? Well, if you haven't calibrated it already, your monitor sucks for looking at photographs! Out of the box, monitors are typically far too bright, have too much blue color, and make your photographs look horrible. The good news is that it is easy to fix!
The first step is to get some sort of monitor calibration device. You can find a whole lot of options at b&h, the world's largest photo store in New York. What you need really depends on how serious you are. Any of them are better than nothing and both Colorvision and Pantone have excellent solutions for around $200.
Then you follow the very easy steps that the software included in the bundle will walk you through. This takes about 15 minutes and should be done once every couple of months, unless you just bought a new monitor, in which case you should do it weekly until you see very little in the way of changes between adjustments.
Then you send in a file to your lab. Make sure to request no corrections. When you get the print back, compare it to your photograph on your monitor. You may need to make some minor corrections to your color profile.
Getting the Clients You Want
When you are shooting, whom are you shooting for? Are you creating images you think will sell, or are you shooting to get the clients you want?
About four years ago, I stopped trying to shoot what I thought my current the clients wanted to buy and started creating images that were more representative of what I wanted my portfolio to look like in the future. This is a very important difference in the way I was approaching wedding photography.
As a result of my new mindset, my work improved, my clients’ satisfaction levels went through the roof and most importantly, I was much happier.
The second part of this is only showing the things you want to sell. Don’t show what you think your clients want to see. Show what you love to do and what you excel at. I stopped showing any group portraits on my site or in my sample books.
Eventually, I started to find new, different clients from my old clientele. They wanted what I was showing, were eager to have me at their wedding, and were willing to pay more for it.
This goes for everything you show. Use the albums that you love. Show the wall samples like you want them to buy. Print up postcards that show your favorite image, not the one you think will be the best seller. Unlike with other businesses, if you captured one percent of the market, you would be overloaded, so what we, as photographers, are trying to do is find the RIGHT clients, rather than just any clients.
Cory Parris is wedding photographer in Seattle, Washington. He loves his wife, his kids, owning his own business, and photography. He is constantly mixing them together to see what he comes up with!
You can find Cory on the web at www.coryparris.com and here!
Subscribe to:
Posts (Atom)